Fillet Weld Symbol
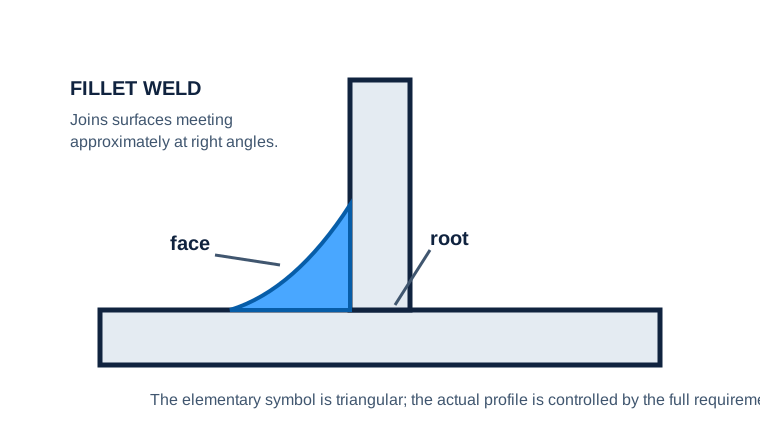
The fillet weld symbol specifies a fillet weld joining surfaces that meet approximately at right angles, such as T-, lap-, and corner joints. The elementary symbol is triangular; the finished weld profile need not be a perfect triangle.
- Recognize a fillet instruction without assuming its dimensions
- Separate size from length and pitch
- Check side, extent, contour, and field/all-around modifiers
Combining unrelated numbers
Fillet symbols are common enough to invite shortcuts. The triangle is only the weld family; the surrounding values determine how much weld goes where.
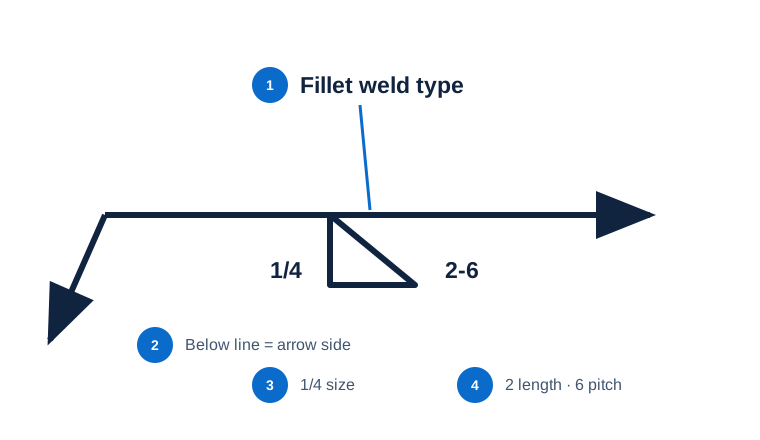
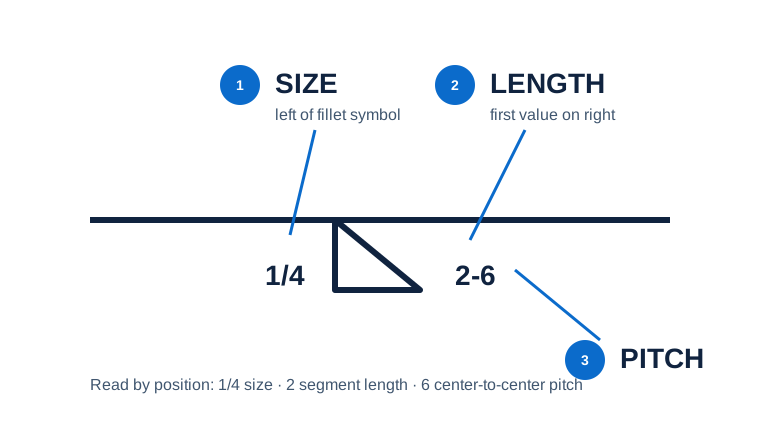
A T-joint callout reads 1/4 and 2-6
The triangle is below the line, with 1/4 to its left and 2-6 to its right.
Read an arrow-side 1/4 fillet made in 2-long segments at 6 center-to-center pitch, using the drawing’s stated units.
You avoid treating 2-6 as weld size or as a two-inch clear gap.
Assign the triangle and every number separately
Begin with the cue in the first column. The final column records the drawing, detail, procedure, or acceptance question that this callout cannot answer by itself.
| Visual cue | What it establishes | What still needs verification |
|---|---|---|
| Triangle | Fillet weld family | Finished contour is controlled separately; the weld need not look like a perfect triangle. |
| Value to the left | Fillet weld size in this common placement | Check units, unequal-leg notation, and project requirements. |
| Length–pitch pair to the right | Intermittent segment length and center-to-center spacing | Pitch is not the clear unwelded gap. |
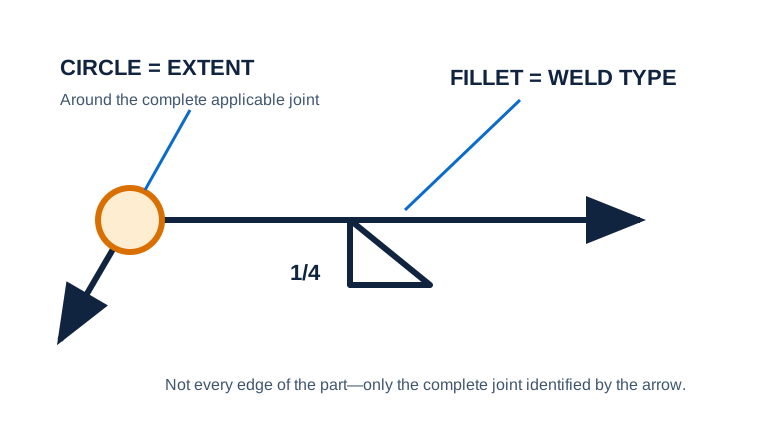
| Circle, flag, or contour mark | Extent, location, or finish modifier | A supplementary mark modifies the fillet; it does not replace it. |
Turn 1/4 and 2-6 into a layout someone can inspect.
A handrail base detail uses an arrow-side intermittent fillet callout. The print reviewer needs a plain-language instruction and a quick check on the first two weld segments.
The triangle identifies the weld family; it does not supply the size.
Read 2-6 as segment length and center-to-center pitch, not as a range.
Verify the drawing units before converting any value into inches or millimeters.
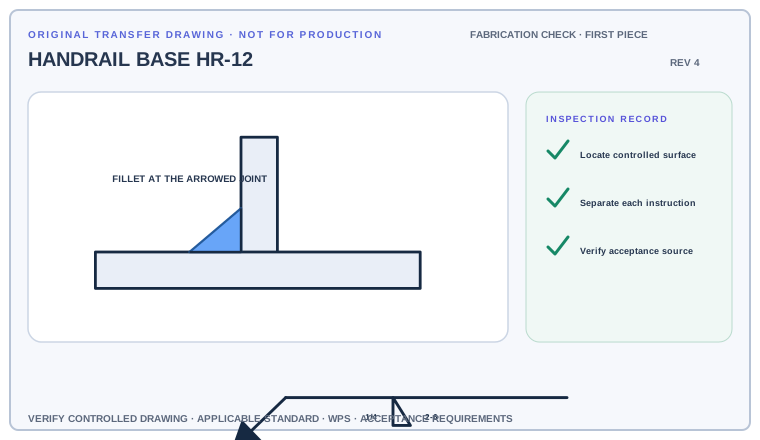
Write the fabrication instruction, sketch two segment centerlines, and state the clear gap for the simple repeating pattern without treating pitch as empty space.
Deliverable · A layout note containing side, size, segment length, pitch, and clear gapCompare with the field read +
Place a 1/4 fillet on the arrow side in 2-unit segments at 6-unit centers. For this simple aligned pattern, the clear gap is 4 units; the drawing and WPS still control units and acceptance.
From callout to first-piece layout
First use the symbol's position to determine the side of the joint. Then read size to the left and any length–pitch pair to the right. Supplementary contour or all-around marks modify the instruction.
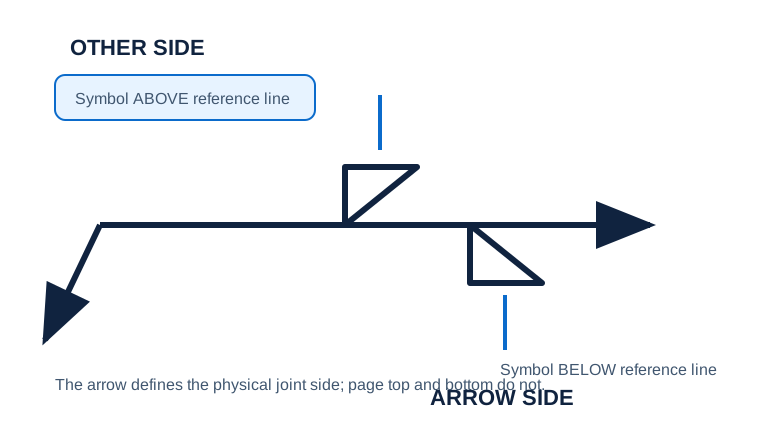
- Confirm whether the fillet symbol is on the arrow side, other side, or both.
- Read the size immediately to the left of the symbol.
- Read length and pitch to the right when present.
- Check for all-around, field-weld, contour, finish, or tail information.
The three shortcuts an inspector should challenge
Combining unrelated numbers
The value left of the fillet symbol is size; values to the right describe length and, when paired, pitch.
Recognizing without locating
The triangle identifies weld type, but its placement determines which side receives it.
Reading geometry as instruction
Part geometry does not replace explicit symbol dimensions, notes, or the governing WPS.
Why a groove-weld reading fails on this joint
Fillet weld
Joins intersecting surfaces, commonly at T-, lap-, or corner joints
Evidence to useIs the triangular elementary symbol present?Groove weld
Uses a groove or prepared joint form
Evidence to useDo not infer groove preparation from a fillet triangle.What must appear in the fabrication handoff?
Use the full list before fabrication, fit-up, or inspection. This is a drawing-reading handoff—not a substitute for the governing acceptance standard.
- 01Confirm arrow/other/both sides
- 02Read size on the left
- 03Read length and pitch on the right
- 04Check extent and contour modifiers
- 05Verify units and WPS
Evidence and limits for this Fillet Weld lesson
This guide teaches common AWS-style drawing interpretation. It is educational material, not a substitute for the purchased standard, project specification, code, WPS, or qualified engineering direction.
How this page was made. The training diagrams, worked example, comparisons, and questions are original educational material. Read the editorial and technical review policy for the full process.
Save your place after Fillet Weld.
This marker records reading progress only; it does not mean the topic is mastered. Use the six-question practice page to check your understanding.
Build outward from Fillet Weld
 Arrow Side vs Other Side
 Size, Length & Pitch
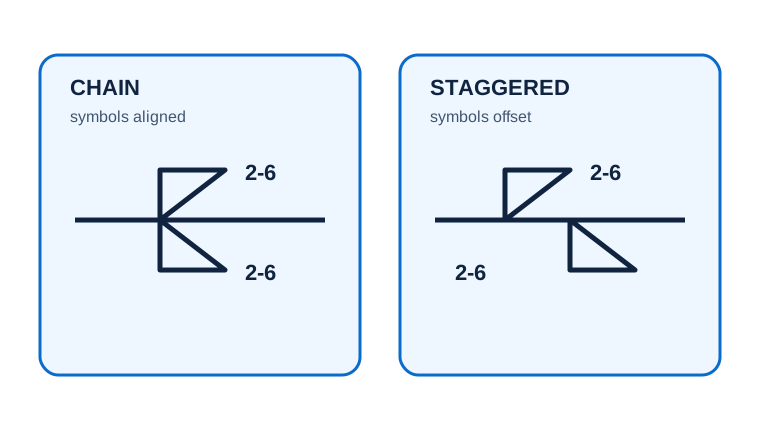 Intermittent Welds
 Weld All Around
Educational practice only. Verify production work against the governing drawing, applicable standard, WPS, and qualified instruction.