Welding Symbol Size, Length and Pitch
Numbers around a weld symbol answer different questions: size describes weld dimension, length describes how far a segment runs, and pitch describes center-to-center spacing in a repeated pattern.
- Read values by position instead of by size or visual prominence
- Distinguish weld size, length, pitch, angle, and root opening
- Explain a dimensional callout in a complete sentence
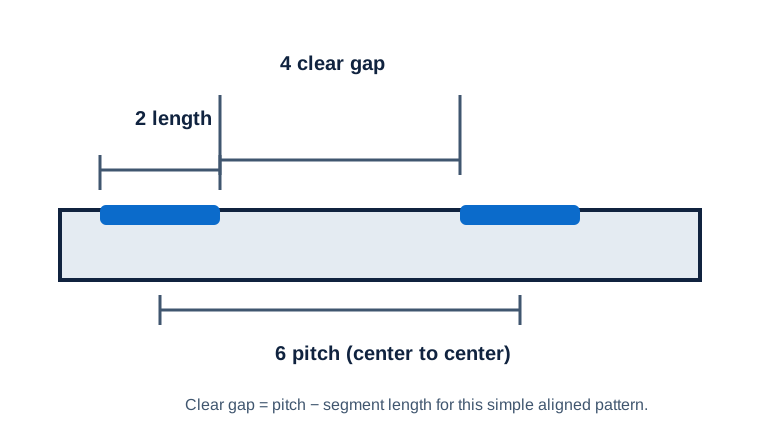
Pitch versus gap
The same number can mean very different things depending on where it sits. Position is the grammar of a welding symbol.
Give every number an owner before doing arithmetic.
A stiffener sheet contains 1/4, 2-6, 60°, and 1/8 around different weld families. The exercise is to map each value by position and context.
Start at the elementary symbol nearest each value.
Keep a degree-marked angle separate from fractions used for linear dimensions.
Record the drawing units once; do not infer them from the fraction format.
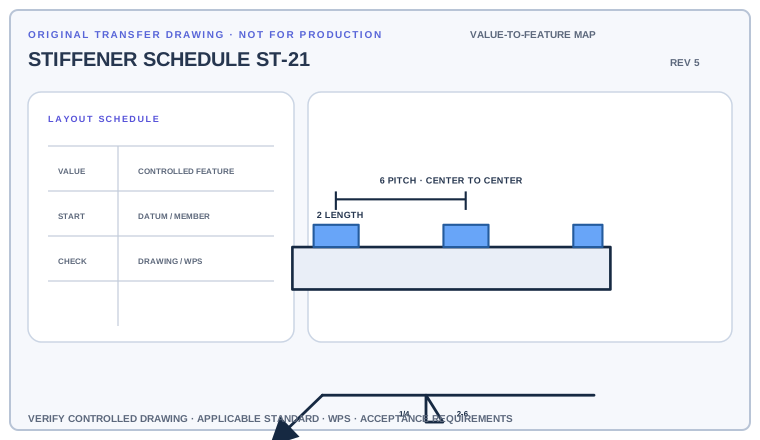
Create a four-column value map: number, nearby symbol, controlled feature, and outstanding verification. Do not use the word size until the weld family supports it.
Deliverable · A value-to-feature map that another trainee can auditCompare with the field read +
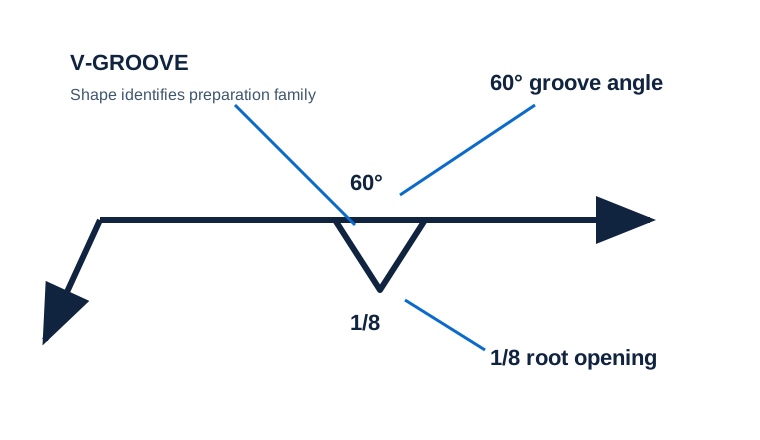
The left-side fraction controls size or groove-depth information according to weld family, the right-side pair controls length and pitch, the degree value controls angle, and the in-symbol value controls root opening in the illustrated example.
Position is the grammar of the number
Begin with the cue in the first column. The final column records the drawing, detail, procedure, or acceptance question that this callout cannot answer by itself.
| Visual cue | What it establishes | What still needs verification |
|---|---|---|
| Left of elementary symbol | Common location for size or groove-depth information | The weld family determines the exact meaning. |
| Right of elementary symbol | Common location for length and pitch | Read paired values in their defined order, not as multiplication. |
| Inside a groove symbol | Root-opening information in the examples used here | Do not confuse it with plate thickness. |
| Degree mark | An angular requirement | Confirm whether the notation controls groove angle or bevel angle. |
Length, pitch, gap, angle, and opening are not interchangeable
Pitch
Center-to-center spacing of repeated welds
Evidence to useClear gap equals pitch minus segment length only for a simple repeating layout.Length
Extent of one weld or segment
Evidence to useDo not apply it automatically to the entire joint.Size / depth
Controls weld or preparation geometry
Evidence to useInterpret it through the elementary symbol and governing convention.The print contains 1/4, 2-6, 60°, and 1/8
Several familiar numbers surround different elementary symbols.
Read each value only after naming the weld family: left-side size/depth, right-side length/pitch, degree-marked angle, and an in-symbol root opening where applicable.
You stop translating every fraction into ‘weld size’ and every hyphen into a range.
Map first, calculate second
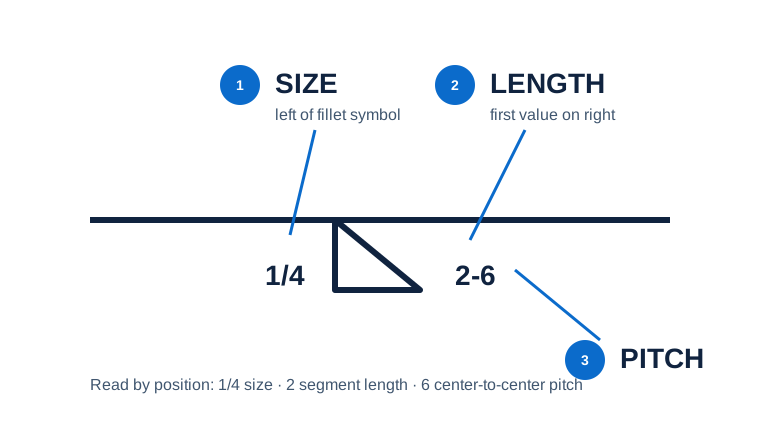
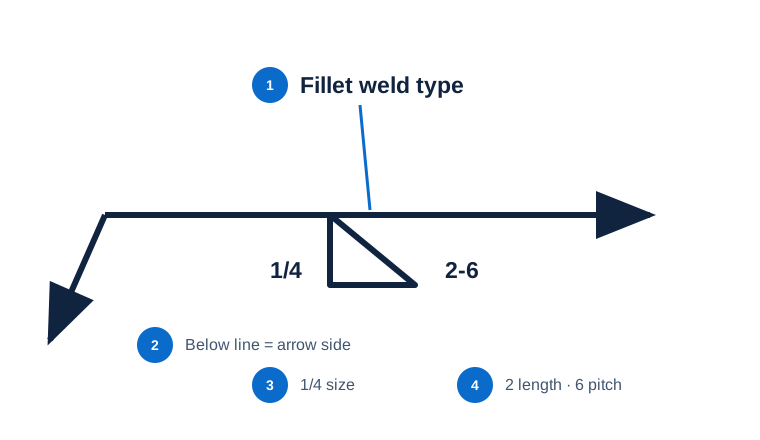
For a typical AWS-style fillet callout, read size on the left. On the right, read a single value as length or a hyphenated pair as length–pitch. Confirm units and exceptions on the drawing.
- Identify the weld type before interpreting any number.
- Read the value to the left according to that weld type's size convention.
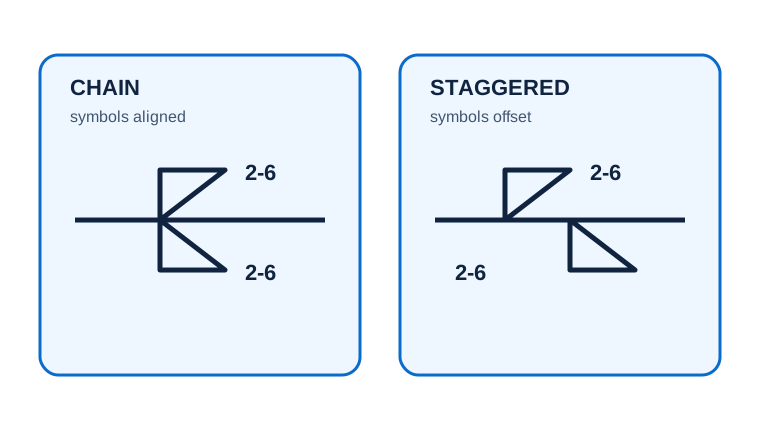
- Read the first value on the right as segment length in the illustrated fillet example.
- Read the second value after the hyphen as pitch and confirm that pitch is center-to-center.
Numbers that look familiar but control different things
Pitch versus gap
Pitch is measured from the center of one repeated weld to the center of the next in this example; the clear unwelded gap is different.
One size rule for all welds
The meaning of size depends on the weld type. Identify the elementary symbol before interpreting the left-side value.
Hyphen as a range
In an intermittent fillet callout, the hyphen separates length from pitch; it does not mean ‘through’.
Can every value be traced to one feature?
Use the full list before fabrication, fit-up, or inspection. This is a drawing-reading handoff—not a substitute for the governing acceptance standard.
- 01Name the weld type first
- 02Associate each number with its position
- 03State the drawing units
- 04Check whether pitch is center-to-center
- 05Look for notes that override defaults
Evidence and limits for this Size, Length & Pitch lesson
This guide teaches common AWS-style drawing interpretation. It is educational material, not a substitute for the purchased standard, project specification, code, WPS, or qualified engineering direction.
How this page was made. The training diagrams, worked example, comparisons, and questions are original educational material. Read the editorial and technical review policy for the full process.
Save your place after Size, Length & Pitch.
This marker records reading progress only; it does not mean the topic is mastered. Use the six-question practice page to check your understanding.
Build outward from Size, Length & Pitch
 Fillet Weld
 Intermittent Welds
 Groove Welds Overview
Educational practice only. Verify production work against the governing drawing, applicable standard, WPS, and qualified instruction.